From June 29-July 2, 2025, San Antonio will become the hub of educational innovation as thousands of educators gather to learn, connect, and grow. Whether you’re a first-time attendee or a conference veteran, this post will help you prepare for an amazing experience!
Three Great Sessions To Check Out This Year!
This year, I am excited to preseneting three sessions focused on supporting Instructional Coaching!
Tuesday July 1: Instructional Coaches Playground
This year at the Instructional Coaches playground on Tuesday July 1, from 12:45-2:45 (Central Time), I will be presenting on two topics.
Using Coaching Newsletters Effectively to Schedule Meaningful Coaching Cycles
Effective Ways to Develop Dynanic Coaching Dashboards
Wedensday July 2: Solo Presentation
On Wednesday, I am excited to present one of my favorite topics on Instructional Coaching.
Using the ISTE Standards to Create a Dynamic Instructional Coaching Department
If you are an Instructional Coach or Digital Learning Leader, these are three great sessions to attend!
Conference Highlights
Dates and Location: June 29-July 2, 2025 in San Antonio, TX at the Henry B. Gonzalez Convention Center
Inspiring Keynote Speakers:
Scott Shigeoka – Internationally recognized curiosity expert and author of “Seek: How Curiosity Can Transform Your Life and Change the World”
Jacqueline Woodson – National Book Award winner, MacArthur Genius Grant fellow, and New York Times bestselling author
Sabba Quidwai, Ed.D. – CEO of Designing Schools, educator, and author focused on design thinking and creating cultures of innovation
Schedule at a Glance
Saturday, June 28: Preconference activities and registration (8am-6pm)
Sunday, June 29: Content sessions, Opening Mainstage, and Welcome Reception (5:30-7pm)
Monday, June 30: Full day of content, Solutions Hub Expo open (9am-5:30pm)
Tuesday, July 1: Mainstage session and full day of content, Solutions Hub Expo open (9:30am-5:30pm)
Wednesday, July 2: Content sessions and Closing Mainstage, Solutions Hub Expo open (9am-1pm)
Tips for Conference Success
Navigate the Exhibit Hall Like a Pro: The ISTE Exhibit Hall (Solutions Hub Expo) is like Disneyworld for educators – full of exciting innovations! Plan your visit strategically by identifying your goals and exploring the exhibitor list in advance
Bring a Conference Buddy: Exploring in pairs or groups allows you to discover booths you might have overlooked and gain different perspectives
Take Strategic Breaks: The expo floor can be overwhelming! Find designated areas to rest and recharge throughout the day
Collect Information Wisely: Be selective with swag and information. Take photos, jot down notes, and get scanned by exhibitors for follow-up information
What Should You Do Before The Conference Begins?
The official ISTELive 25 mobile app is your essential companion throughout the conference. Available for both iOS and Android devices, the app allows you to create a personalized schedule, receive real-time updates about session changes, navigate the convention center with interactive maps, connect with other attendees, and access digital resources from presenters. Download it at least a week before the conference to start planning your experience!
How Can You Stay Updated During the Conference?
During the conference, there will be PLENTY of social chatter going on. My best advice to keep up to date with everything official happening at the conference is to follow the offiical ISTE Social Media accounts.
Join my Newsletter Today!
Stay updated on our latest podcasts and educational news articles by filling out our contact form below.
Like this:
LikeLoading…
Discover more from TeacherCast Educational Network
Subscribe to get the latest posts sent to your email.
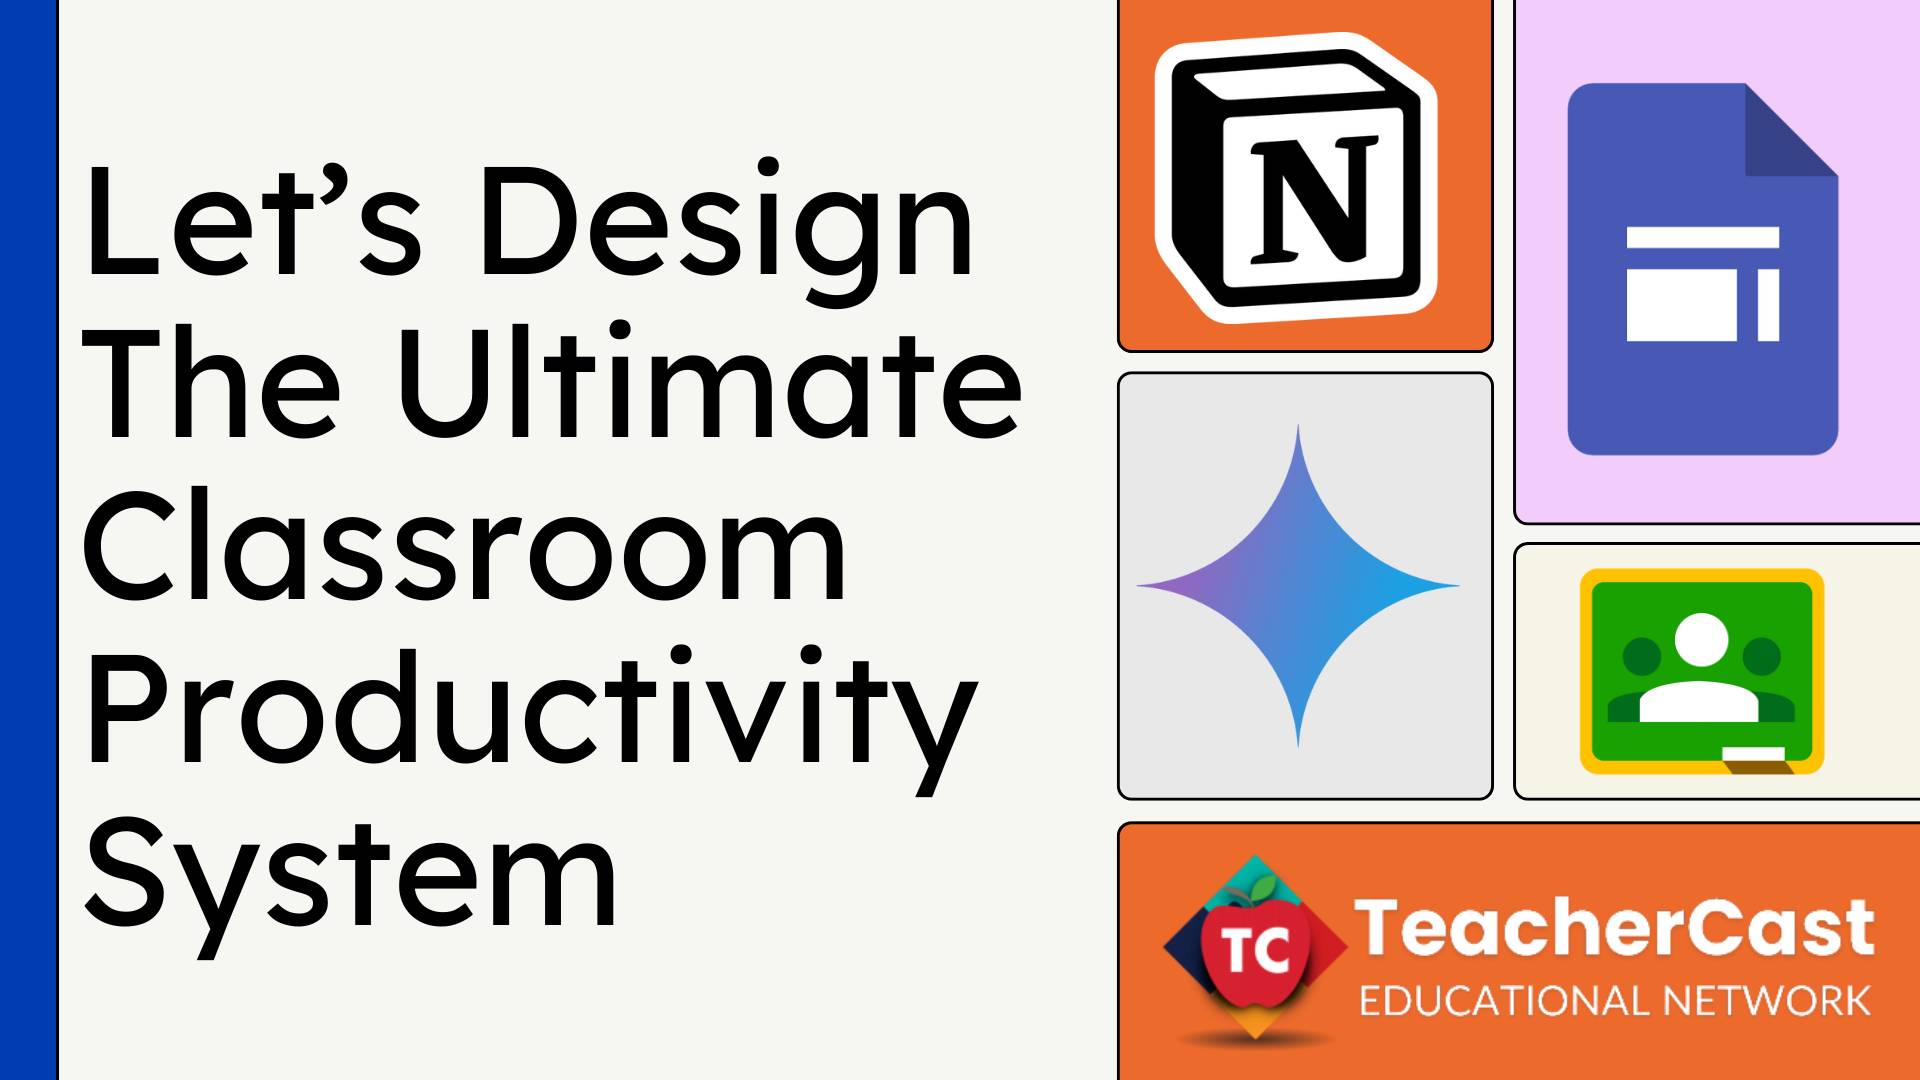
In today’s rapidly evolving educational landscape, teachers face unprecedented challenges in managing their workload, engaging students, and delivering high-quality instruction. The need for an efficient productivity system has never been more critical.
How can we build a productivity system that gives us more quality time with our students and our families while enabling us to create dynamic classroom lessons?
In this post, I’ll share the applications I use in my Ultimate Teacher Productivity System and show you how to adapt these tools to create your own system—one that works for you and your fellow teachers.
This comprehensive guide explores how educators can leverage Google Sites, Google Classroom, Google Gemini, and Notion to create a powerful, integrated system that streamlines their teaching practice.
Understanding the Need for a Digital Productivity System
Modern educators juggle numerous responsibilities, from lesson planning and content creation to student assessment and parent communication. Without a well-organized digital system, these tasks can quickly become overwhelming. A thoughtfully designed productivity system helps teachers maintain focus, reduce stress, and ultimately spend more time on what matters most: teaching and supporting students.
When I begin designing any type of productivity system that supports learning, I have have two needs:
A system to “put things”
A system to “push things”
For this reason, we will begin creating our Ultimate Teacher Productivity System with two of my favorite applications, but think about them in a way that you might not be used to thinking about them.
Core Components of the System
Google Sites: Your digital hub where teaching & learning happens
When creating the Ultimate Productivity System, one needs to think about both themselves as the creator and organizer as well as their end user (or student). Google Sites, for me, is the ultimate digital hub for this type of project because it provides a dynamic canvas from which you will organize and present all of your teaching materials.
By creating a Google Site to use as your primary teaching vehicle, you have the opportunity to put everything you need to teach a lesson on a single page and make it visually available to your students. The site can be broken down into pages and sections for easy navigation and on the top right, you have a universal search bar for your content to be easily found when needed.
My Ultimate Productivity Toolbox: Google Sites Class Website
There are many reasons why Google Sites should be considered when designing your next digital hub.
Google Sites: Pros
Open for parents & students & administrators
Easy to manage and update
Visual for students to be able to learn from it
Google Sites, no matter how great, does come with some limitations and challenges as a designer. There are limitations in this application as a system alone because when used in isolation, there is no way to build a solid Learning Management System (LMS) that allows for document transfer and a check for student understanding but, we will get to that later in this post.
Google Sites: Cons
No way for students to receive documents
No true document organizational system
When building a complete LMS solution, it’s important to understand that while Google Sites excels as a place to “put” all your information on a single page—making it available both now and in the future—you still need a system for document management and transfer. This is where Google Classroom comes into play.
Google Classroom: A mobile friendly dashboard connecting Google Drive & Calendar
Google Classroom is the go-to solution for most Google EDU teachers to digitaly instruct from. If we break down what Google Classroom actually is and what function it serves, we can describe it as as a visual dashboard.
Under the hood of Google Classroom lies two systems; Google Drive and Google Calendar.
My Ultimate Productivity Toolbox: Google Classroom
Google Classroom, is essentially the dashboard that connects these two systems.
A Teacher creates an assignment … it gets organized in Google Drive
A Teacher adds a date to an assignment … it is recorded in Google Calendar and an Event Notification is created in the back end which can support it’s powerful notification system.
Let’s take a look at some of the ways that Google Classroom fits int our Ultimate Productivity System.
Google Classroom: Pros
Email notifications provide constant communication with parents
Students only see what they need to see when it’s released by the teacher
All files are organized in Google Drive folders in the Classroom folder
For all that we love Google Classroom for, it does have a few drawbacks.
Google Classroom: Cons
What happens at the end of the school year when you archive your class?
In my opinion, I believe that Google Sites and Google Classroom should be thought about and executed as if they were one and only one application. This allows teachers to have a place to “put” their lesson materials and a place to “push” their lesson materials to students.
Notion: A Complete and Dynamic Organizational System to Support Classroom Instruction
When creating the Ultimate Productivity system for your classroom, there are applications such as Google Sites and Google Classroom that are front facing and are designed to be seen by students, teachers, parents, and administrators. They are the ones that every educator knows of and probably uses every day. When it comes to organizing documents, resources, notes, and lesson plans on the back end, there is only one application that I have used for the last several years to keep me organized and that is Notion.
What is Notion?
Notion is a dynamic productivity application that can be thought of as “digital lego” and it is the one application that I open more often than any other every single day. Notion, when first turned on, is a free application that has replaced most of the reasons for me to use Google Docs or Microsoft Word. When you merge Notion note pages into Notion Database pages, you have the ability of creating a back end productivity system that will keep track of virtually all aspects of your day.
I have had the opportunity of working with teachers, coaches, administrators, and businesses to help them understand the power of Notion and how it can be used to keep every aspect of their digital world organized. Let’s take a look at a few reasons why Notion might be right for you.
Notion: Pros
Highly customizable workspace that adapts to individual teaching styles and needs
Powerful database features for tracking assignments, grades, and student progress
Seamless integration of text, media, and embedded content for comprehensive lesson planning
Notion: Cons
Steeper learning curve compared to simpler note-taking applications
Limited real-time collaboration features in the free version
Can become overwhelming if not properly organized and maintained
It doesn’t take too long to search YouTube to learn how to use Notion and there are hundreds of templates, both free and paid that will help you get started. One of my favorite places to get educational templates is www.Notion4Teachers.com. Just about every week, Milo creates and publishes outstanding templates that will help you get up and running quickly for a very low price.
Visit my TeacherCast Online Store to Purchase my Notion Templates!
If you are an Instructional Coach or Digital Learning Administrator looking to start with a template this year, please visit my TeacherCast Online Store and check out my Notion templates today.
Google Gemini: AGAME CHANGING “Guide on the Side”
Google Gemini represents a significant advancement in AI-assisted teaching and learning. When integrated into your productivity system, it can revolutionize how you prepare and deliver instruction while maintaining your authentic teaching voice. Here’s how Gemini can enhance your educational workflow:
With Gemini’s AI capabilities, teachers can quickly generate differentiated learning materials, create engaging lesson content, and develop personalized assessment tools. The AI assistant helps streamline routine tasks while allowing educators to focus on meaningful student interactions and creative teaching moments.
I have only started to really put Google Gemini to the test but so far, it has been a valuable tool to help provide me lesson ideas that I then build away from the AI world.
Let’s take a look at why using an AI application such as Google Gemini might be good for you.
Google Gemini: Pros
Rapidly generates creative lesson ideas and differentiated learning materials
Assists in creating engaging assessment questions and rubrics
Helps analyze student performance patterns to inform instruction
Google Gemini: Cons
Requires careful review and customization of AI-generated content
Learning curve to craft effective prompts
Information provided still needs to be researched for accuracy.
You can access Google Gemini through gemini.google.com, where it’s integrated with other Google Workspace tools to enhance your teaching workflow.
The introduction of Google Gemini brings artificial intelligence into the educational toolkit, offering unprecedented support for various teaching tasks. This powerful AI assistant can help generate creative lesson ideas, develop differentiated learning materials, and provide insights into student performance patterns. Teachers can leverage Gemini to enhance their instruction while maintaining their unique teaching style and educational philosophy.
From drafting initial lesson plans to creating engaging assessment questions, Gemini serves as a collaborative partner in the educational process. Its ability to understand context and generate relevant content makes it an invaluable tool for teachers looking to enhance their instructional materials while saving time on routine tasks.
Creating Synergy Between Applications
The true power of this productivity system emerges when all components work together seamlessly. Google Sites serves as the public face of your teaching practice, while Google Classroom handles daily interactions with students. Gemini enhances content creation and analysis, and Notion manages your personal organization and planning.
This integrated approach allows for smooth workflows between planning and execution. For example, lesson plans developed in Notion can be easily transformed into assignments in Google Classroom, while resources created with Gemini’s assistance can be shared through Google Sites. The system’s flexibility allows teachers to adapt it to their specific needs while maintaining consistency and efficiency.
Implementation Strategies for Success
Implementing a comprehensive productivity system requires careful planning and a gradual approach. Start by identifying your most pressing needs and implementing the most relevant components first. This might mean beginning with Google Classroom for daily teaching activities, then gradually introducing other elements as you become more comfortable with the system.
Regular maintenance and updates are crucial for long-term success. Set aside time each week to review and organize your digital resources, update content, and refine your workflows. Pay attention to student feedback and be willing to adjust your approach based on what works best for your teaching style and your students’ needs.
Measuring Impact and Continuous Improvement
The effectiveness of your productivity system should be regularly evaluated based on several key metrics: time saved on administrative tasks, student engagement levels, and the quality of educational outcomes. Track these factors and make adjustments as needed to optimize your system’s performance.
Because of the productivity system I created for my classroom, I have been able to provide a higher level of instruction and provide my students learning opportunities with and without me lecturing to them every day.
In the chart below, the blue represents a pre-test score and the red represents a post test score. Although there are a number of factors that contributed to their success, one of the major factors was me being organized and ready to teach every day and provide them the best that I could possible be on any given day of the semester.
Remember that building an effective productivity system is an iterative process. What works perfectly for one teacher might need modification for another. The key is to remain flexible and open to change while maintaining the core structure that supports your teaching practice.
Looking to the Future
As educational technology continues to evolve, your productivity system should evolve with it. Stay informed about new features and updates to your core tools, and be prepared to integrate new technologies that could enhance your teaching practice. The goal is to maintain a system that grows with you and continues to support your educational objectives effectively.
Building a comprehensive productivity system using Google Sites, Google Classroom, Google Gemini, and Notion represents a significant investment in your teaching practice. While the initial setup requires time and effort, the long-term benefits – including reduced stress, improved organization, and more time for meaningful teaching interactions – make it well worth the investment. By thoughtfully implementing and maintaining this system, you can create a more efficient, effective, and enjoyable teaching experience for both yourself and your students.
Let’s Build Your Ultimate Productivity Suite … Together!
If you are looking to build a productivity system for your classroom, coaching, or school district, I would love to help you out. I am always available through my Contact Page and always happy to jump on a call to discuss any of these applications … especially Notion!
So, what do you want your Ultimate Productivity Suite to look like this year?
Join my Newsletter Today!
Stay updated on our latest podcasts and educational news articles by filling out our contact form below.
Like this:
LikeLoading…
Discover more from TeacherCast Educational Network
Subscribe to get the latest posts sent to your email.
Do you remember your last epiphany? That moment when—whether walking or driving—everything suddenly clicks and the world makes perfect sense?
Well, yesterday I had one of those moments, and I can’t wait to share it with you.
Are you ready?
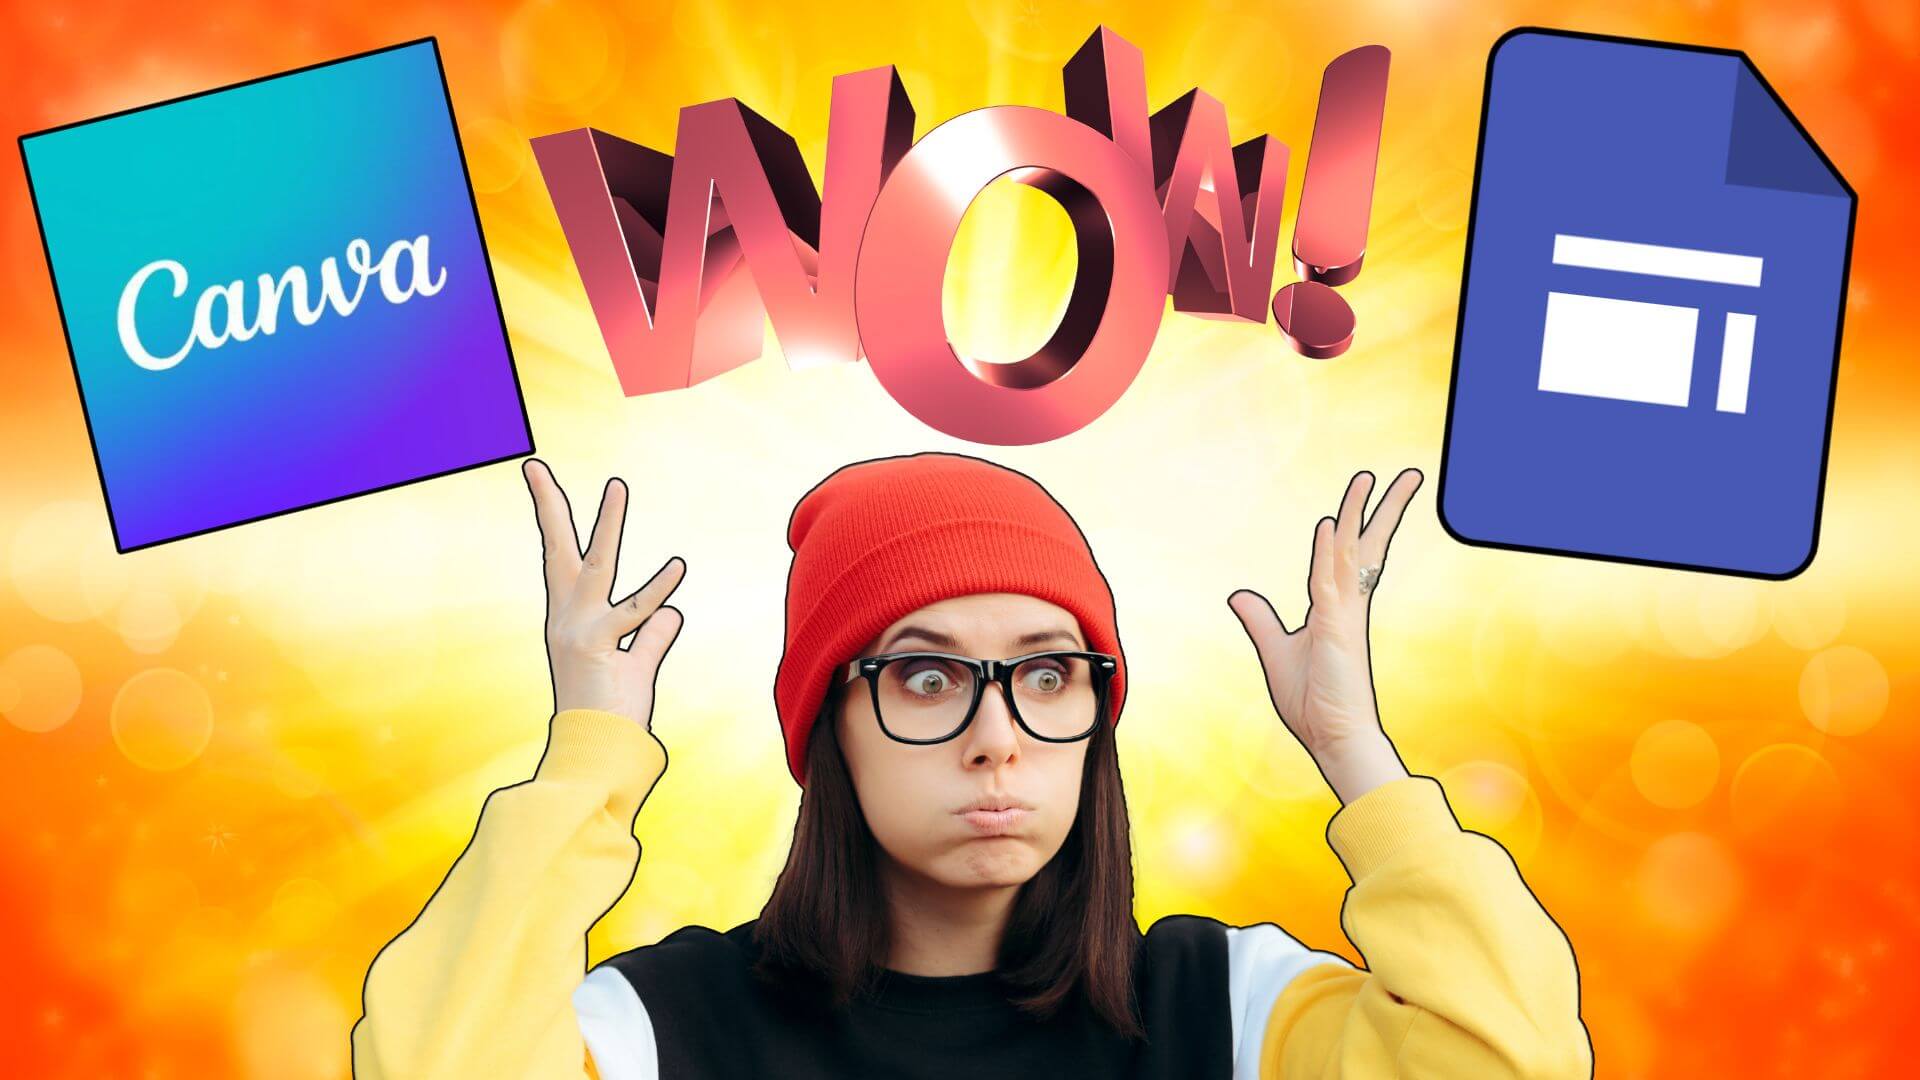
Canva + Google Sites = AWESOME!
Let me back up a second.
For the last 13+ years, I’ve been a HUGE fan of Google Sites. I use them for everything—running professional development sessions, organizing classroom lesson plans, and showing teachers and coaches how they perfectly complement Google Classroom to create a unified teaching experience.
But let’s face it, they have a drawback.
3 Unfortunate Issues with Google Sites that Need to be Fixed
I often have said “Google is WONDERFUL, until it needs to be.” (am I right?)
Sure Google Sites are great, but often I have a hard time getting the best results out of them.
One of the biggest feature annoyances is the header section. Many people (including my students) want to create nice looking graphics and add them in the header area, only to find that the header images natively is responsive. This means that when you look at your Google Site in tablet mode or mobile mode the header graphic gets cut off so you can’t see any words on the image you just spent a ton of time creating.
NOT GOOD!
My solution to this is often to create a generic header image, toss it in the image area up top and then use Google Site’s text area to overlap so that when it retracts on mobile, the words don’t get cut off.
But this takes time, planning, and most people won’t think of this.
Strike 1
Problem #2: You are locked in to a clunky website layout
Don’t get me wrong here, one of the blessings of Google Sites is that it IS simple to make a website out of. I have my students each year using Google Sites to create a simple one-page website that acts as a digital poster all the time. But getting them to think about layout in terms of what it looks like on mobile devices is impossible.
For this reason, I teach students about creating posters rather than creating websites.
Strike 2
Problem #3: You are extremely limited in what you can do with images.
Website images. How I loath the process of finding images for websites.
Build a site layout
Figure out what you want on the page
Go search for the image
Stick the image on the website
Realize that it’s not looking good
Import the image into a graphic editor
Export again
Repeat the process.
Who has time for this?
Strike 3
There has to be a better way of creating a nice looking website, especially with your students, quickly and efficiently.
This is where I mind was blown when I realized that Canva can do … this!
Enter Canva Docs: My New BFF
The other day, I was searching for a way to build a course workbook for some upcoming presentations. I tried designing something in Google Sites but it really wasn’t looking the way I wanted it to look.
I went on to Canva and tried creating something using one of the premade templates but I’m not the greatest designed on the planet and it wasn’t doing much for me.
That’s when I started looking into Canva Docs.
MIND BLOWN!
Did you know that Canva Docs is the PERFECT solution and PERFECT partner for creating amazing looking Google Sites?
How to Merge Canva Docs and Google Sites to Create a Great Looking Website
To merge Canva Docs and Google Sites, the process is pretty simple. I’m not sure why I didn’t think about this earlier.
To add a Canva Doc into a Google Site there are two simple steps.
Add a New Page to a Google Site
Step 1: Add a New Page
On the right side of Google Sites, make sure you are on the Pages tab
At the bottom, click on the PLUS circle and then select “Full Page Embed”
Name your page and select “Done”
This will then create a new blank page where Google Sites will ask you to provide either a URL to embed on the page, or you can select something directly from Google Drive.
Pro Tip: This is a great way of building a clean Google Sites page from a Google Doc, Spreadsheet, or Google Slides file. (Forms also works great!)
Find the Embed Link from a Canva Doc
Step 2: Create a Canva Doc and copy it’s embed code into Google Sites
In Canva, create a new Canva Doc and design it how you wish it to look.
On the top right, click on the SHARE button
Click on EMBED
Click and copy the “Smart Embed Link”
Paste this link into Google Sites where it says “Add embed”
Choose the option on the left to embed the full page Canva Doc into Google Sites
Sit back and wait to be AMAZED
Again… Mind blown!
Canva Docs & Google Sites … Perfect Together!
Ever since I realized that you can marry Canva Docs and Google Sites, I have been a busy busy creator. There are so many reasons why you should give this a try today!
When creating a Canva Doc, you have the option of adding a banner graphic to the very top and having it be seen full width. When you look at your Canva Doc acting as a website in Google Sites, these headers are amazing, clean and yes… RESPONSIVE! This means that they show up in all their full glory no matter what the screen size is.
Reason #2: Extremely Clean Layout Options
One of the advantages I found using Canva Docs as my website builder is the fact that I can now add my content just about anywhere on the page with few limitations. (Limitations that actually make me rethink what are usually poor layout decisions).
True, you need to start thinking more vertically with your content choices, but thats actually a feature (rather than a bug) that helps you think like your students or website readers. This simple yet flexible layout allows you to focus on your content rather than your page design.
Reason #3: Unlimited Graphical Resources
Let’s face it, you now have the ability to do anything you can in Canva, directly in Canva. This means you can bring in images, remove their backgrounds and make quick decisions without spending a ton of time on Google Image Search.
You also have all of the features found in Canva AI allowing you to create, manipulate, and reevaluate everything quickly and far simpler than when working natively in Google Sites or any other website editor.
Another great feature of working in Canva Docs is the ability to bring in all of your Canva projecs, images, presentations, and logos without the need for switching between multiple applications.
Get Your Canva and Google Sites Game On Today!
Is your mind blown about the possibilities that a Canva and Google Sites marriage have for your projects, lesson plans, and presentations? I know that I am!
Ready to take your website game to the next level?
Don’t miss out on more tips, tricks, and tech insights that can transform your digital presence.
Sign up for my newsletter below and join a community of educators who are pushing the boundaries of what’s possible with educational technology. Each week, I’ll share exclusive content, fresh ideas, and step-by-step tutorials that you won’t find anywhere else.
Are your students struggling to understand complex historical timelines? Many history teachers face a common challenge – helping students grasp and visualize interconnected historical events, especially during pivotal periods like World War II. Traditional textbooks, with their dense paragraphs, often leave students overwhelmed and disconnected from the material.
Here’s where Google Sheets comes to the rescue with its powerful timeline feature. This versatile tool transforms complex historical data into clear, interactive visual timelines that enhance student comprehension and engagement. Through hands-on experience with several history classes, I’ve seen how this simple yet effective tool helps students better understand historical relationships and concurrent events.
In this comprehensive guide, I’ll walk you through creating dynamic, engaging timelines using Google Sheets. Whether you’re a history teacher mapping out World War II events, a curriculum planner organizing yearly objectives, or an educator helping students manage project deadlines, you’ll discover how to create interactive timelines that make learning more accessible and engaging.
What You’ll Need
A Google account (your school account works perfectly)
Basic familiarity with Google Sheets
Events or milestones you want to visualize
Let’s Create Your Timeline
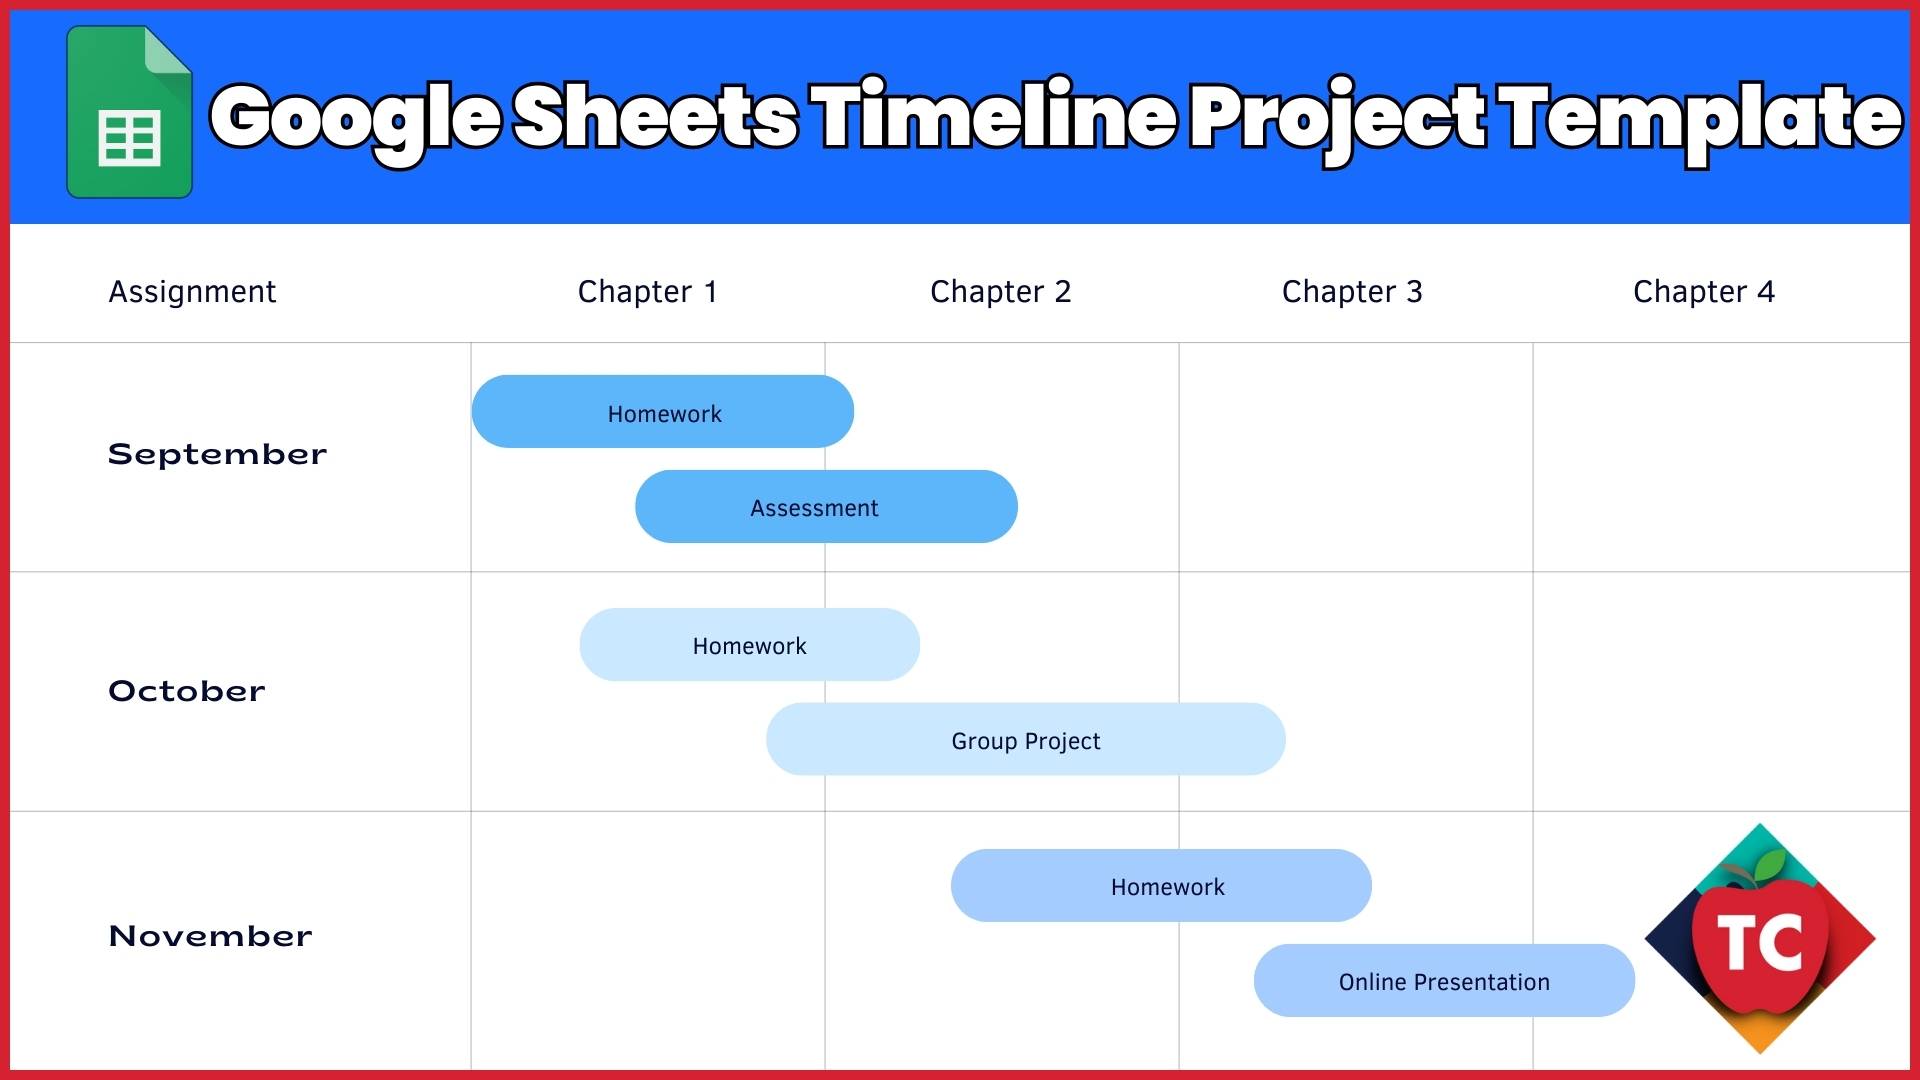
Step 1: Setting Up Your Data
First things first – let’s organize our information in a way that Google Sheets can understand:
Open a fresh Google Sheet (I like to name mine right away to stay organized)
Create three columns: Date, Event Title, and Description
Pro Tip: I always freeze my header row to make scrolling easier later
Step 2: Creating Your Timeline Chart
Here’s where the magic happens:
Highlight your data range (including headers)
Click Insert > Timeline
Watch your data transform into a visual timeline!
Step 3: Making It Look Professional
Let’s make your timeline pop with some educator-friendly customizations:
Use different colors to categorize events (great for visual learners!)
Add detailed tooltips to provide additional context
Adjust the date format to match your needs (especially helpful for historical events)
Classroom Application Ideas
Historical Event Mapping: Perfect for showing cause and effect relationships
Project Management: Help students track group project milestones
Curriculum Planning: Map out your units across the school year
Literary Timeline: Track events in a novel or play
Troubleshooting Tips
After helping dozens of teachers implement this in their classrooms, here are the most common issues I’ve encountered and their solutions:
Dates not showing correctly? Double-check your date format consistency
Timeline too crowded? Try creating separate timelines for different themes or periods
Need more visual impact? Experiment with different colors and font sizes in the Chart Editor
What Can You Do with Google Sheet Timelines?
Remember, the goal isn’t just to create a pretty timeline – it’s about making information more accessible and engaging for our students. I’d love to hear how you’re using timelines in your classroom! Reach out on social media to share your ideas.
Happy teaching!
Join my Newsletter Today!
Stay updated on our latest podcasts and educational news articles by filling out our contact form below.
Like this:
LikeLoading…
Discover more from TeacherCast Educational Network
Subscribe to get the latest posts sent to your email.
In the dynamic world of education, specifically providing 1:1 support in the classroom, instructional coaches serve as the crucial bridge between administration and teachers, facilitating professional growth and enhancing student learning outcomes. However, the growing complexity of this role demands more than just pedagogical expertise – it requires masterful organization and efficient productivity systems.
When I first took on the role of an Instructional Coach more than 15 years ago, I had nothing more than the tools provided to me by my district, specifically the ones in what was then called Google Apps. Docs, Sheets, Slides, Sites, Classroom. It was primative at the time, but that was what we had to use.
Why Productivity Matters in Instructional Coaching
The modern instructional coach wears multiple hats: mentor, data analyst, professional development facilitator, and change agent. Without robust productivity systems in place, these diverse responsibilities can quickly become overwhelming, potentially diminishing the coach’s effectiveness and impact on teacher development.
Consider these daily coaching responsibilities:
Conducting classroom observations and providing timely feedback
Analyzing student achievement data to guide instructional decisions
Planning and facilitating professional development sessions
Meeting with teachers for one-on-one coaching sessions
Documenting coaching cycles and tracking progress
Communicating with administrators and stakeholders
Each of these tasks generates valuable data that needs to be collected, organized, analyzed, and presented effectively. This is where the right productivity tools become indispensable.
The Power of Digital Forms in Instructional Coaching
Why Digital Forms Are Essential
The first tool in our productivity arsenal is a robust digital forms platform, such as Google Forms or Microsoft Forms. These tools revolutionize how coaches collect and organize data, making the process more efficient and accurate.
Key Benefits of Digital Forms
Instant data collection and organization
Customizable templates for different observation types
Mobile accessibility for real-time documentation
Automatic time-stamping of observations
Easy sharing and collaboration capabilities
Practical Applications for Instructional Coaches
Digital forms can transform various aspects of coaching:
1. Classroom Observations
Create customized observation forms that align with your school’s teaching framework. Include both quantitative and qualitative data points, making it easy to track specific teaching strategies and student engagement levels.
2. Teacher Feedback Surveys
Develop forms for teachers to reflect on their practice and provide feedback on coaching support. This data helps coaches adjust their approach to better meet teacher needs.
3. Professional Development Planning
Use forms to gather information about teachers’ professional learning needs and preferences, ensuring that professional development initiatives are targeted and effective.
Spreadsheet Analytics: Converting Data into Insights
The second essential tool is a powerful spreadsheet application like Google Sheets or Microsoft Excel. These platforms transform raw data into meaningful insights that drive coaching decisions.
Why Spreadsheets Matter in Coaching
Spreadsheets serve as the engine room for data analysis, helping coaches:
Track patterns in teaching practices over time
Identify areas of strength and growth opportunities
Generate visual representations of progress
Create data-driven coaching plans
Essential Spreadsheet Applications for Coaches
1. Teacher Growth Tracking
Create comprehensive spreadsheets that monitor teacher progress across multiple indicators, making it easy to identify trends and celebrate growth.
2. Student Achievement Analysis
Design systems to analyze student performance data, helping teachers make data-informed instructional decisions.
3. Coaching Impact Metrics
Develop dashboards that showcase the impact of coaching interventions on teacher practice and student learning.
Notion: The Game-Changing Platform for Instructional Coaches
While forms and spreadsheets are valuable tools, Notion represents the evolution of productivity applications, offering a comprehensive solution that combines the best features of multiple tools into one powerful platform.
Why Notion Stands Out
Notion’s unique architecture makes it particularly well-suited for instructional coaching:
1. Unified Workspace
All coaching documentation, resources, and data live in one searchable, organized space. No more switching between multiple applications or hunting for important documents.
2. Customizable Systems
Create personalized workflows that match your coaching style and school’s needs. From observation templates to professional development tracking, everything can be customized.
3. Interactive Databases
Build dynamic databases that track teacher progress, professional development participation, and coaching cycles with ease.
Practical Applications of Notion in Coaching
1. Coaching Cycle Management
Design comprehensive systems to track multiple coaching cycles, including pre-observation conferences, classroom observations, and follow-up meetings.
2. Resource Library
Create a searchable database of teaching strategies, professional articles, and instructional resources that teachers can easily access.
3. Professional Development Hub
Manage professional learning initiatives, track participation, and house all related resources in one organized space.
4. Data Dashboard Creation
Build beautiful, interactive dashboards that showcase coaching impact and teacher growth over time.
Getting Started
To successfully implement these tools in your coaching practice:
Start small and gradually expand your use of each tool
Focus on one system at a time to avoid overwhelming yourself or your teachers
Regularly gather feedback from teachers about the effectiveness of your digital tools
Continuously refine and adjust your systems based on actual usage and needs
Building Sustainable Systems
The key to long-term success with these tools is creating sustainable systems that:
Save time rather than create additional work
Provide clear value to both coaches and teachers
Scale easily as your coaching responsibilities grow
Support your school’s professional development goals
The Future of Instructional Coaching
As education continues to evolve, the role of instructional coaches will become increasingly data-driven and technology-dependent. The coaches who thrive will be those who effectively leverage productivity tools to enhance their impact.
Your Next Steps
Ready to transform your Instructional Coaching? Start by exploring Notion’s free platform. Its combination of flexibility, organization, and data management capabilities makes it the perfect foundation for building a more efficient and effective coaching system. Join the growing community of instructional coaches who are using Notion to amplify their impact and better serve their teachers.
If you are looking for help getting started with your Instructional Coaching Data Dashboard in Notion, I have put together a fantastic Data Dashboard and Command Center that is now being used by hundreds of Instructional Coaches. I hope you have a chance to check it out today!
Remember, the goal of implementing these tools is not just to be more organized – it’s to create more time and space for what matters most: supporting teachers in their professional growth and, ultimately, improving student learning outcomes.
Join my Newsletter Today!
Stay updated on our latest podcasts and educational news articles by filling out our contact form below.
Like this:
LikeLoading…
Discover more from TeacherCast Educational Network
Subscribe to get the latest posts sent to your email.
Are you looking for an engaging and creative way to incorporate digital learning into your classroom? Look no further than Google Slides Animation Projects!
Google Slides is often thought of as a traditional presentation tool. Yet, in the hands of students and their creativity, the possibilities are endless. The best part is that this project can be used repeatedly. It works with countless topics in all grade levels.
In this post, we’ll explore how to use this versatile tool. It can help create exciting stop motion animation projects with your students.
Why Use Google Slides Animation Projects?
Google Slides isn’t just a PowerPoint substitute – it’s a powerful platform for creative projects. Here’s why it’s perfect for stop motion animation:
Easy to use and accessible for students of all ages
Collaborative features allow for group projects
No need for specialized software or equipment
Teaches valuable digital skills alongside curriculum content
How Google Slide Animation Works
Just like a traditional flipbook, you can use Google Slides to position transparent images on a common background. Over the course of several slides, move them into various positions as the slide deck moves ahead. You can watch this video to understand how simple it is to copy an image. Then, you can paste it across an entire presentation.
When you get to the second and third characters in your story, you copy the image. Then, you paste the image instead of creating a brand new slide.
The principle behind stop motion in Google Slides is like a traditional flipbook:
Position transparent images on a common background
Move the images slightly across several slides
When played in sequence, it creates the illusion of movement
Students can easily copy and paste images across slides, adjusting their position to create smooth animations.
Step-by-Step Guide to Creating Google Slide Animations
Creating stop motion animations with Google Slides is a straightforward process that anyone can master. By using a few simple steps, students can bring their ideas to life through engaging animated sequences. Here’s a concise guide to help you and your students get started with this exciting digital storytelling technique.
Set up your background: Choose or create a static background for your animation.
Add characters or objects: Insert transparent PNG images of the elements you want to animate.
Duplicate slides: Copy your first slide multiple times.
Make small changes: On each slide, slightly adjust the position of your animated elements.
Add transitions: Use slide transitions to control the speed of your animation.
Play and refine: View your animation and make adjustments as needed.
Curriculum Integration Ideas
Once your students have mastered Google Slides features like drag, drop, flip, grouping, transparency, and recoloring, you can introduce the concept. Teach each feature until they feel comfortable using them. Then incorporate it into a curricular project.
One of the best ways to introduce this lesson in your classroom is at the end of the week. I recommend doing this activity on a Friday after lunch. At this time, your students are energized to go home. They can spend the weekend creating something extraordinary. On the next Monday or Tuesday, you can host a film festival for them to showcase their work. This approach allows students to test their digital learning skills. It also puts the application’s learning directly in their hands.
Stop motion animation with Google Slides can be adapted to various subjects:
Science: Animate cell division or the water cycle
History: Illustrate exploration routes or historical events
Math: Create visual representations of equations or geometry concepts
Language Arts: Bring stories or poems to life
Tips for Success
Introduce the project on a Friday, allowing students to work over the weekend
Host a “film festival” the next week for students to showcase their work
Teach Google Slides features like drag, drop, flip, grouping, and transparency
Encourage creativity and experimentation
Conclusion
Using Google Slides for stop motion animation is an innovative way to engage students in digital learning. It also reinforces curriculum concepts. It’s a versatile, accessible tool that can transform your classroom into a creative studio. Give it a try and watch your students imaginations come to life!
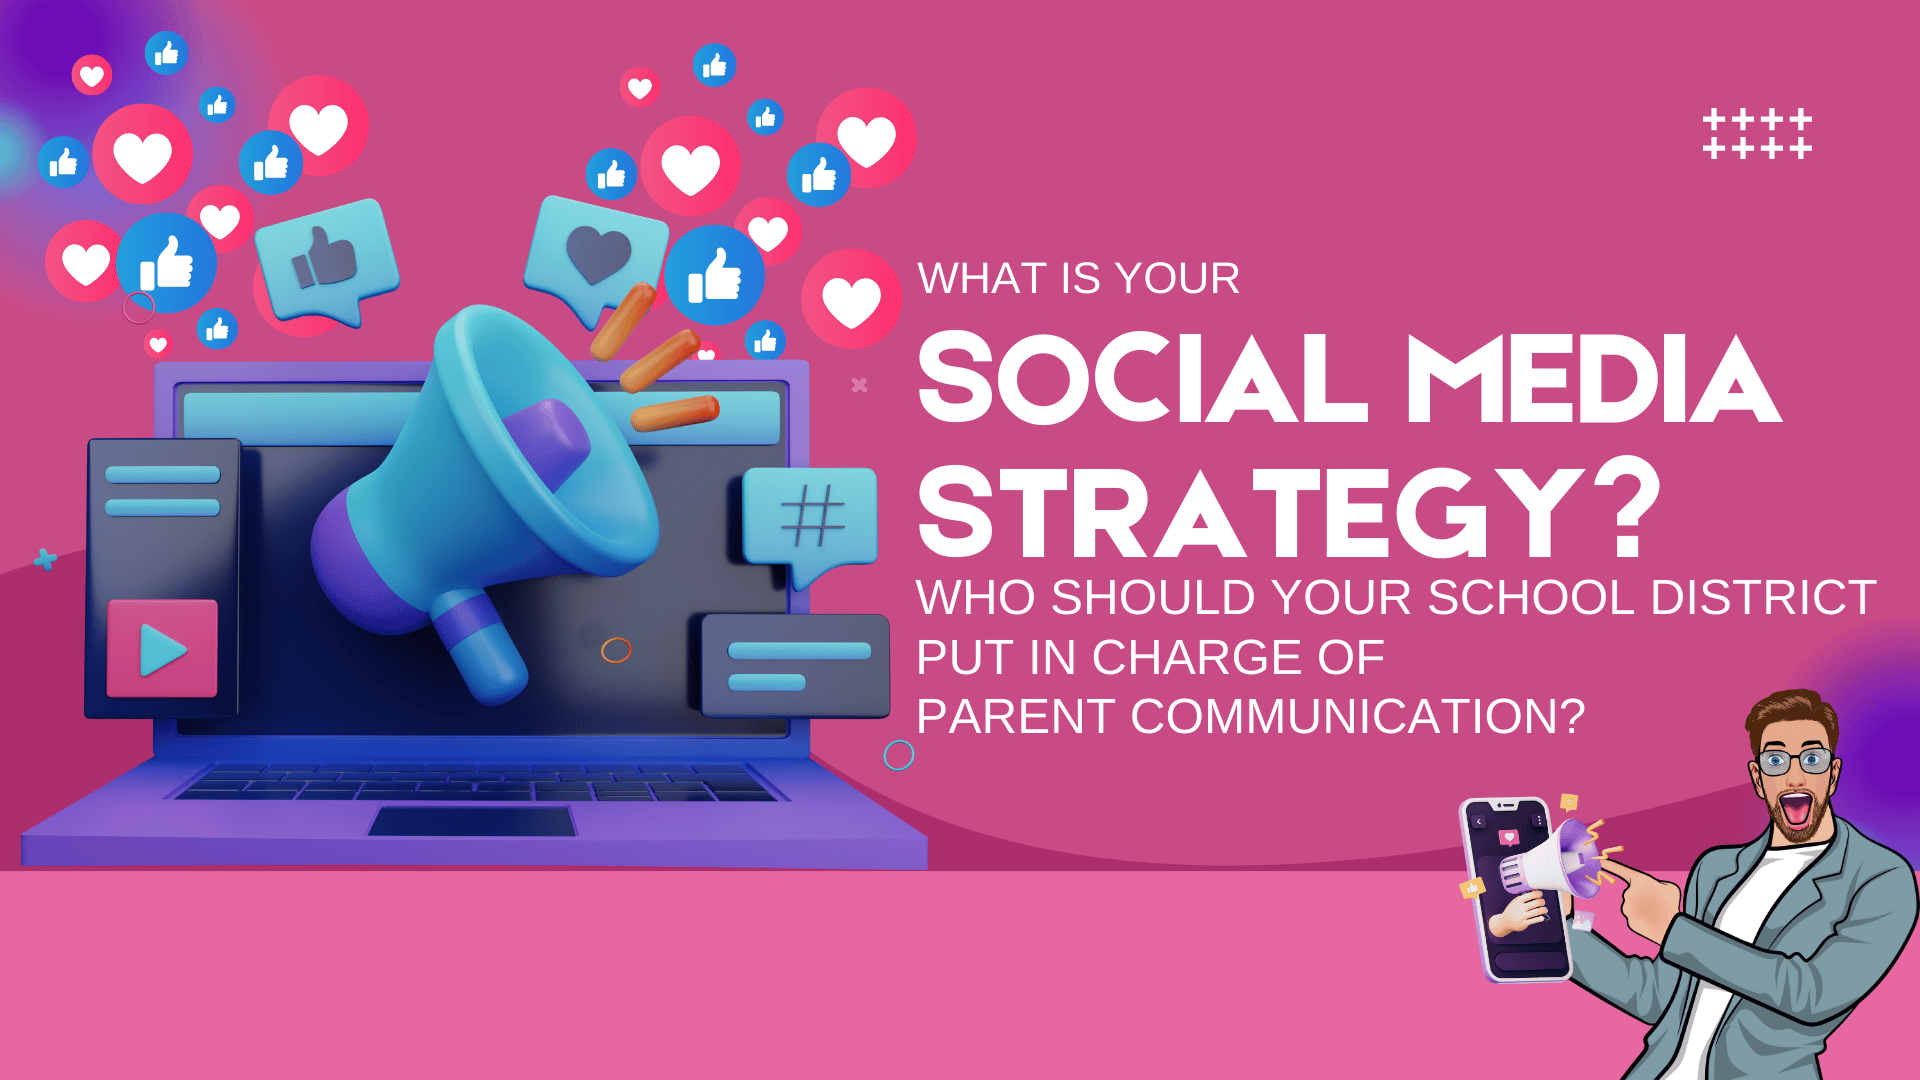
In today’s digital age, school districts are no longer confined to communicating through traditional channels. The rise of social media has opened up new avenues for educational institutions to connect with their local and global communities. As schools strive to enhance their online presence, a crucial question emerges: Does your school district need a Social Media Manager?
What is a Social Media Manager?
A Social Media Manager serves as the virtual voice for the school district, bridging the gap between the institution and its community. They are responsible for managing various platforms such as Facebook, Twitter, and mobile apps, which have become integral to modern school communication strategies.
Key Skills for an Educational Social Media Manager
To effectively manage a school district’s social media presence, a Social Media Manager should possess the following essential skills:
Confidentiality: They must be trustworthy and have access to sensitive information to provide timely and accurate updates to the community.
People-Friendly: The ability to work quickly and efficiently with a team to gather and share content is crucial in the fast-paced world of social media.
Community Awareness: Understanding the community’s communication preferences and technological capabilities is vital for effective outreach.
Persistence: Building a strong social media presence requires consistent effort and regular communication.
Speed and Patience: The role demands quick action in sharing updates while also having the patience to implement long-term social media strategies.
The Role of a Social Media Manager in Schools
The primary responsibility of a Social Media Manager in a school district is communication. They must:
Speak on the level of their audience, understanding the nuances of social media language and trends.
Train the community on new technologies and digital communication tools.
Collaborate with various departments to gather content and implement a comprehensive social media plan.
Act as the liaison between the school and the community, sharing both positive news and critical information during emergencies.
Conclusion
In an era where digital communication reigns supreme, a dedicated Social Media Manager can significantly enhance a school district’s ability to connect with its community. By leveraging social media platforms effectively, schools can foster better engagement, improve transparency, and build stronger relationships with students, parents, and the broader community.
Links of Interest:
Stay informed about the latest trends in educational social media management by subscribing to our newsletter. If you have any questions or need further guidance on implementing a social media strategy for your school district, don’t hesitate to reach out through our contact form. Let’s work together to enhance your school’s digital presence and community engagement!
Join my Newsletter Today!
Stay updated on our latest podcasts and educational news articles by filling out our contact form below.
Like this:
LikeLoading…
Discover more from TeacherCast Educational Network
Subscribe to get the latest posts sent to your email.
In today’s rapidly evolving educational landscape, the need for efficient knowledge management and streamlined processes has never been more critical. As educators, instructional coaches, and district leaders, we are constantly seeking innovative solutions to enhance our productivity and effectiveness. Enter the concept of building a “second brain” for your school district – a digital system that extends our mental capabilities and revolutionizes how we capture, organize, and retrieve information. In this comprehensive guide based on my popular TeacherCast University Workshop, we’ll explore the power of building a second brain and why Notion AI should be your go-to solution for creating this transformative system.
What is a Second Brain?
The term “second brain” has gained significant traction in recent years, particularly in the realm of digital productivity and knowledge management. Popularized by productivity expert Tiago Forte, author of “Building A Second Brain,” this concept refers to creating a digital system that serves as an extension of our cognitive abilities. It’s designed to offload information and ideas into a reliable external system, allowing us to focus on creative thinking and problem-solving rather than mere information retention.
While the term may be relatively new, the concept of external knowledge management has deep roots in practices like commonplace books, where individuals would compile knowledge from reading, observation, and thought. The digital age has simply provided new tools and methods to implement this age-old concept more efficiently.
The Importance of a Second Brain in Education
For educators, instructional coaches, and district leaders, implementing a second brain system can be transformative. Here’s why:
Managing increasing workloads and information overload
Improving efficiency in lesson planning and resource management
Enhancing collaboration among educators
Streamlining administrative tasks
Supporting data-driven decision making
Notion AI: Your Ultimate Second Brain Solution
When it comes to building a second brain for your school district, Notion AI stands out as a powerful and versatile solution. Here’s why Notion AI should be your top choice:
Centralized Knowledge Repository: Notion AI provides a single platform to store and organize all your educational resources, lesson plans, and administrative documents.
Intelligent Categorization and Tagging: Notion AI’s smart features help automatically categorize and tag your content, making it easier to find and retrieve information when you need it.
Automated Summarization: Save time by letting Notion AI summarize long documents or research papers, allowing you to quickly grasp key points.
Smart Search and Retrieval: Notion AI’s powerful search capabilities ensure you can find the information you need in seconds, even across large databases.
Collaboration Tools: Enhance teamwork among staff with Notion AI’s robust collaboration features, allowing real-time editing and commenting.
Customizable Templates: Create and share templates for common educational tasks, streamlining workflows across your district.
Data Analysis and Visualization: Leverage Notion AI to analyze student performance data and create insightful visualizations for data-driven decision making.
Implementing Notion AI in Your School District
Here are some practical ways to leverage Notion AI in your educational setting:
Lesson Planning: Use Notion AI to create, store, and share lesson plans. The AI can help generate ideas, suggest resources, and even assist in crafting learning objectives.
Student Performance Tracking: Build databases to track student progress, with Notion AI providing insights and suggesting interventions based on the data.
Create a knowledge base for teacher training materials, with Notion AI helping to organize and summarize key information.
Administrative Tasks: Streamline processes like budget management, inventory tracking, and scheduling using Notion AI’s organizational capabilities.
Communication Hub: Use Notion AI to create a central communication platform for your district, with AI-assisted features for drafting announcements and newsletters.
Notion Data Privacy: A Safe Platform for Your School’s Information
When considering any digital platform for educational use, data privacy is paramount. Notion takes this responsibility seriously, implementing robust security measures to protect your school’s sensitive information:
Encryption: Notion uses TLS 1.2 encryption for data in transit and AES 256-bit encryption for data at rest.
Compliance: Notion is SOC 2 Type 2 certified, demonstrating its commitment to security, availability, and confidentiality.
Data Control: You maintain ownership and control of your data, with the ability to export it at any time.
Regular Audits: Notion undergoes regular third-party security audits to ensure the highest standards of data protection.
Privacy Shield Certified: Notion complies with the EU-U.S. and Swiss-U.S. Privacy Shield Frameworks. These security measures make Notion a safe and reliable platform for storing and managing your school district’s information.
Getting Started with Notion AI
Ready to build your school district’s second brain with Notion AI? Here are some steps to get started:
Explore Templates: Notion offers a variety of education-specific templates to help you get started quickly.
Customize Your Workspace: Tailor Notion to your specific needs by creating databases, pages, and workflows that align with your district’s processes.
Train Your Team: Provide training sessions for your staff to ensure everyone can leverage Notion AI effectively.
Start Small: Begin with one or two key areas (e.g., lesson planning or student tracking) and gradually expand your use of Notion AI.
Conclusion: Embrace the Future of Education with Notion AI
Building a second brain for your school district is no longer a luxury – it’s a necessity in our information-rich world. Notion AI offers a powerful, flexible, and secure solution to help educators, instructional coaches, and district leaders manage knowledge, streamline processes, and enhance collaboration.
By embracing Notion AI, you’re not just adopting a new tool; you’re revolutionizing how your district operates. This can lead to improved educational outcomes, more efficient administrative processes, and a more innovative learning environment. The potential benefits are vast:
Enhanced productivity and time management for educators
Improved collaboration and knowledge sharing among staff
More effective lesson planning and resource management
Data-driven decision making capabilities
Streamlined administrative tasks
As we navigate the complexities of modern education, tools like Notion AI become indispensable in our quest to provide the best possible learning experiences for our students. By building a second brain for your district, you’re investing in a future where information is easily accessible, collaboration is seamless, and innovation thrives.
Are You Ready To Build Your Second Brain?
Ready to transform your school district with the power of a second brain? Here are some concrete steps you can take today:
Try our Instructional Coaches Command Center Notion template: This template is specifically designed to help you get started with organizing your coaching department. It provides a framework that you can customize to fit your district’s unique needs.
Sign up for Notion today using our affiliate link: www.teachercast.net/notion. By using this link, you’ll not only get started with Notion, but you’ll also support our efforts to provide valuable resources to educators.
Explore Notion’s education-specific templates: Notion offers a variety of templates tailored for educational use. Spend some time browsing these to get ideas for how you can structure your district’s second brain.
Schedule a demo or training session: If you’re new to Notion, consider scheduling a demo or training session for your team. This can help everyone get on board and understand how to use the platform effectively.
Start small and scale up: Begin by implementing Notion in one department or for one specific process. As you see success, you can gradually expand its use across your district.
Resources for Building a Second Brain and Using NotionAI
Official Notion Resources
Notion Templates for EDU
Join my Newsletter Today!
Stay updated on our latest podcasts and educational news articles by filling out our contact form below.
Like this:
LikeLoading…
Discover more from TeacherCast Educational Network
Subscribe to get the latest posts sent to your email.
In today’s rapidly evolving educational landscape, technology plays a crucial role in enhancing learning experiences. Microsoft Bing for Education stands out as a powerful tool that can revolutionize the way educators teach and students learn. This blog post will explore the features and benefits of Bing for Education, highlighting how it can boost productivity in the classroom and transform the educational journey.
Unlocking the Potential of Bing for Education
Bing for Education is more than just a search engine; it’s a comprehensive platform designed to support educators and students alike. Here are some key features that make it an invaluable resource in the classroom:
Ad-free search environment: Ensures students can focus on learning without distractions
Enhanced privacy: Protects student data and maintains a safe online learning space
Curated educational content: Provides access to high-quality, curriculum-aligned resources
Reading level filters: Allows teachers to tailor search results to students’ comprehension levels
Boosting Teacher Productivity with Bing for Education
Bing for Education offers several features that can significantly enhance teacher productivity:
Lesson planning tools: Access to a vast library of educational resources and lesson plan templates
Integrated Microsoft tools: Seamless integration with Microsoft 365 for efficient workflow management
Analytics and insights: Data-driven insights to help teachers track student progress and adjust teaching strategies
Classroom Applications of Bing for Education
Educators can leverage Bing for Education in various ways to create engaging learning experiences:
Virtual field trips: Explore the world through immersive 3D maps and street views
Research projects: Guide students in conducting safe, reliable online research
Interactive quizzes: Create and share quizzes using Bing’s integrated quiz maker
The Power of AI in Education
As we delve deeper into the capabilities of Bing for Education, it’s important to recognize the role of artificial intelligence (AI) in shaping the future of learning. AI-powered features in Bing for Education are transforming the way educators approach teaching and how students engage with information.
AI-Enhanced Search Capabilities
Bing for Education’s AI algorithms provide more accurate and relevant search results, helping students find the information they need quickly and efficiently. This not only saves time but also helps develop critical thinking skills as students learn to evaluate and synthesize information from various sources.
Personalized Learning Experiences
AI enables Bing for Education to adapt to individual student needs. As students use the platform, it learns their preferences and learning styles, offering tailored content recommendations and search results that align with their educational goals.
Language Support and Translation
For diverse classrooms, Bing for Education’s AI-powered translation features break down language barriers, allowing students to access information in their preferred language and fostering a more inclusive learning environment.
Integrating Bing for Education with Other Microsoft Tools
One of the strengths of Bing for Education is its seamless integration with other Microsoft educational tools. This integration creates a comprehensive ecosystem that supports various aspects of teaching and learning:
Microsoft Teams for Education
Combining Bing for Education with Microsoft Teams allows for collaborative research projects, where students can share and discuss their findings in real-time. Teachers can create assignments that utilize Bing’s search capabilities directly within Teams, streamlining the workflow for both educators and students.
OneNote Class Notebooks
Integrating Bing for Education with OneNote Class Notebooks enables students to easily insert research findings, images, and other content directly into their digital notebooks. This integration encourages organized note-taking and supports multimedia learning experiences.
Microsoft Forms
Educators can use Bing for Education in conjunction with Microsoft Forms to create interactive quizzes and surveys. The AI-powered search can help teachers find relevant questions and content to include in their assessments, ensuring that they are up-to-date and aligned with curriculum standards.
Are you looking for a simple and safe way to teach your students about internet search? Bing offers teachers and students ad-free search to help you create a distraction-free learning environment. In today\’s video, Jeff talks to Kristen and Ericka about the many ways they are engaging students in their classrooms using Bing.
Resources for Learning
About Our Guests
Kristen Messer is an educator with 21 years of experience in both primary and high school settings. She currently works at be.tech Career Academy in Manteca Unified School District where she helps CTE teachers to bring technology into their classes and offer support to students. She has served on the Superintendent’s Technology Action Committee and is a Tech Champion—a liaison between the district and school sites—for her school. Kristen is honored to be a Microsoft Innovative Educator Expert and an MIE Master Trainer. She enjoys spending time with her husband, Jason, and 2 daughters, Kailin and Kaicie.
Ericka Meadows has taught in the Manteca Unified School District for 20 years. Currently, she teaches second grade at Walter Woodward Elementary. Ericka is MIE trained and has offered staff development training on Surface Pro 2 and Bing in the Classroom. In addition, she has served on superintendent\’s Going Digital committee.
Professional Development Opportunities
To fully harness the potential of Bing for Education, Microsoft offers various professional development opportunities for educators:
Microsoft Innovative Educator (MIE) Program
The MIE program is designed to help educators develop their skills in using Microsoft technologies, including Bing for Education. By becoming a Microsoft Innovative Educator, teachers can access exclusive resources, training, and a global community of like-minded professionals.
Microsoft regularly offers webinars and online courses focused on Bing for Education and other educational tools. These sessions provide hands-on training and practical tips for implementing these technologies in the classroom.
Success Stories: Bing for Education in Action
Let’s look at some real-world examples of how educators are using Bing for Education to transform their teaching practices:
Case Study: Enhancing Research Skills
A high school history teacher in California used Bing for Education to guide students through a research project on the Civil Rights Movement. The teacher reported that the ad-free environment and curated content helped students stay focused and find reliable sources more easily. The reading level filters were particularly useful for differentiating instruction among students with varying reading abilities.
Case Study: Supporting STEM Education
A middle school science teacher in Texas utilized Bing for Education’s virtual field trips feature to take her students on a tour of the solar system. This immersive experience sparked students’ interest in astronomy and led to increased engagement in subsequent lessons on space science.
The Future of Education with Bing
As technology continues to evolve, so does Bing for Education. Microsoft is committed to enhancing the platform based on educator feedback and emerging educational trends. Some areas of future development may include:
Enhanced AI-powered tutoring capabilities
Improved accessibility features for students with diverse learning needs
Expanded virtual and augmented reality experiences for immersive learning
Getting Started with Bing for Education
For educators interested in implementing Bing for Education in their classrooms, here are some steps to get started:
Check with your school or district IT department to see if Bing for Education is already available in your institution.
If not, work with your administration to set up Bing for Education for your school or classroom.
Explore the available resources and training materials to familiarize yourself with the platform.
Start small by incorporating Bing for Education into one lesson or unit, then gradually expand its use as you become more comfortable with the tool.
Conclusion: Embracing the Future of Education
Microsoft Bing for Education is more than just a tool; it’s a gateway to a world of educational possibilities. By harnessing its features, educators can create more engaging, productive, and effective learning environments. As we continue to navigate the digital age, tools like Bing for Education will play a crucial role in preparing students for the challenges and opportunities of tomorrow.
Ready to take your teaching to the next level with Bing for Education? Sign up for our newsletter to receive regular updates, tips, and resources on leveraging technology in the classroom. Don’t miss out on the latest innovations in educational technology – subscribe today!
Join my Newsletter Today!
Stay updated on our latest podcasts and educational news articles by filling out our contact form below.
Like this:
LikeLoading…
Discover more from TeacherCast Educational Network
Subscribe to get the latest posts sent to your email.
As Instructional Coaches, we play a pivotal role in shaping the student- centered learning. Our mission is to guide teachers towards innovative practices that engage students and prepare them for the challenges of the 21st century. In this article, we’ll explore how to support teachers in moving beyond traditional methods and embracing modern, student-centered approaches to learning.
The Evolution of the Flipped Classroom
The concept of the flipped classroom has been around for over a decade, but it’s time for us to help teachers reimagine this approach for today’s learners. While the traditional model focused heavily on pre-recorded video lessons, we need to guide educators towards a more dynamic and interactive learning environment.
Key Elements of Student-Centered Learning
As we support teachers in their journey towards innovation, let’s focus on these critical aspects:
1. Facilitating Student-Centered Learning
Encourage teachers to shift from being the “sage on the stage” to becoming facilitators of learning. This means creating opportunities for students to take charge of their own learning process. Help teachers design lessons that allow students to explore, question, and discover, rather than passively receive information.
2. Leveraging Technology Creatively
Guide teachers in thinking outside the box when it comes to educational technology. For instance, demonstrate how Google Slides can be used for more than just presentations – it can be a canvas for interactive storytelling, a tool for collaborative brainstorming, or a platform for digital portfolios.
Introduce teachers to the versatility of G-Suite applications for flipping the classroom. Show them how Docs, Slides, Forms, Sites, Classroom, and YouTube can be used in innovative ways to engage students both in and out of the classroom.
Work with teachers to create learning experiences that are authentic and meaningful to students. Encourage the development of project-based learning units that allow students to apply their knowledge to real-world scenarios. This approach not only makes learning more engaging but also helps students develop critical thinking and problem-solving skills.
4. Fostering a Culture of Multiple Perspectives
Help teachers move away from assessments that only have one correct answer. Instead, guide them in creating open-ended questions and assignments that encourage diverse thinking and creative problem-solving. This approach allows students to demonstrate their understanding in unique ways and promotes deeper learning.
5. Promoting Collaboration and Communication
Emphasize the importance of collaborative learning environments. Show teachers how to design lessons that require students to work together, share ideas, and learn from one another. This not only enhances learning but also helps develop essential 21st-century skills like communication and teamwork.
Strategies for Instructional Coaches
As we guide teachers towards these innovative practices, here are some strategies we can employ:
1. Model Innovative Practices
When working with teachers, use the same innovative techniques you’re advocating. For example, create flipped learning experiences for your professional development sessions. This allows teachers to experience the benefits firsthand and gives them a model to emulate.
2. Provide Hands-On Support
Offer to co-plan and co-teach lessons that incorporate these innovative strategies. This hands-on approach can help teachers feel more confident in trying new methods.
3. Encourage Reflection and Iteration
After implementing new strategies, guide teachers through a reflection process. What worked well? What could be improved? How did students respond? Use these reflections to refine and improve the approach.
4. Create a Community of Practice
Facilitate regular meetings where teachers can share their experiences with innovative practices. This peer-to-peer learning can be incredibly powerful and helps create a culture of innovation within the school.
5. Showcase Success Stories
Highlight teachers who are successfully implementing innovative practices. Share their stories, invite them to present at staff meetings, or organize classroom visits. This recognition can inspire other teachers to embrace change.
Overcoming Challenges
As we guide teachers towards innovation, we’re likely to encounter some resistance. Here are some common challenges and how to address them:
1. Time Constraints
Many teachers feel overwhelmed by their current workload and may resist adding “one more thing.” Help them see how these innovative practices can actually save time in the long run by increasing student engagement and reducing behavior issues.
2. Technology Hesitation
Some teachers may feel uncomfortable with technology. Offer one-on-one support, start with simple tools, and gradually introduce more complex applications as their confidence grows.
3. Assessment Concerns
Teachers may worry about how innovative practices align with standardized tests. Work with them to show how these approaches actually deepen understanding and critical thinking skills, which ultimately lead to better test performance.
Listen to the latest episode of “Ask the Tech Coach” Podcast today!
Empowering Education Through Innovation and Community
As Instructional Coaches, we stand at the forefront of educational transformation. By guiding teachers towards innovative, student-centered practices, we’re not just preparing students for the future – we’re actively shaping it. Our role in fostering environments that nurture creativity, critical thinking, and collaboration is crucial in meeting the evolving needs of 21st-century learners.
Remember, this journey of innovation isn’t about discarding all traditional methods, but rather about thoughtfully evolving our approach. By cultivating a culture of continuous improvement and embracing new ideas, we empower educators to create dynamic, engaging, and effective learning experiences that resonate with today’s students.
Let’s take this exciting challenge head-on and lead the charge in revolutionizing education. Together, we can make a profound and lasting impact on countless students and teachers. But our journey doesn’t end here – it’s just beginning.
To stay connected and continue growing as an Instructional Coach:
Subscribe to my newsletter for regular updates, tips, and insights on innovative teaching practices.
Join our vibrant Instructional Coaches Network on Facebook to share ideas, challenges, and successes with peers.
Connect with me on LinkedIn for professional development opportunities and the latest trends in educational innovation.
By joining these communities, you’ll be part of a movement that’s actively shaping the future of education. Together, let’s inspire, innovate, and ignite a passion for learning in classrooms around the world!
Join my Newsletter Today!
Stay updated on our latest podcasts and educational news articles by filling out our contact form below.
Like this:
LikeLoading…
Discover more from TeacherCast Educational Network
Subscribe to get the latest posts sent to your email.